
Main Courses
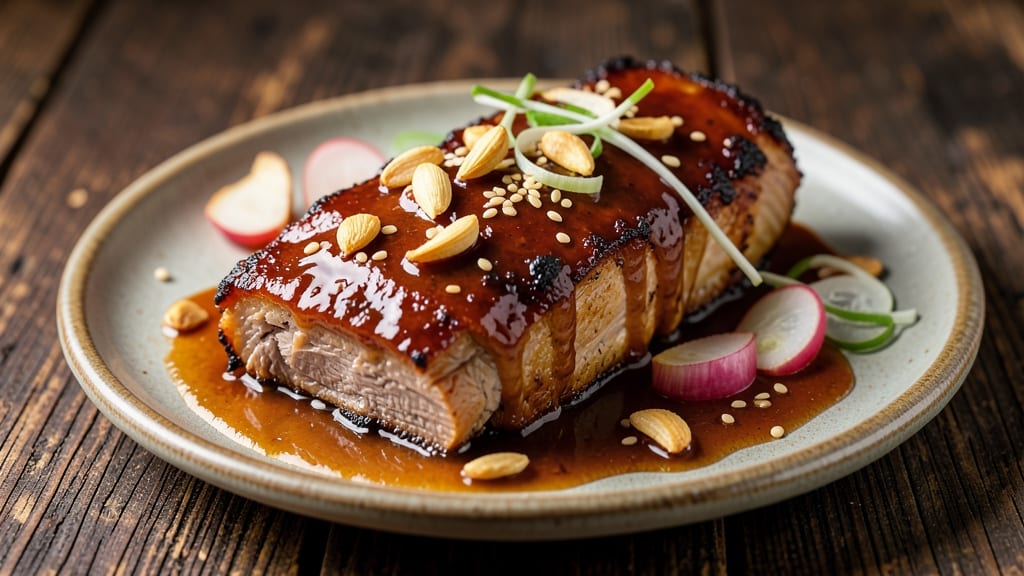
This adobo pork loin recipe brings the bold, tangy flavors of Filipino cuisine to your kitchen with minimal effort. ✨ After perfecting it through years of testing—from smoky backyard grills to my farmhouse kitchen—I’ve developed a method that delivers restaurant-quality results without the fuss.
The secret lies in the marinade: a perfect balance of vinegar and soy that tenderizes the meat while building layers of depth.
What sets this recipe apart is its versatility—whether you’re braising it low and slow or searing it quickly over high heat, the result is melt-in-your-mouth pork with a glossy, caramelized crust.
The marinade doesn’t just flavor the meat; it transforms it, creating a dish that’s as satisfying as it is aromatic. I’ve simplified the process for home cooks while keeping the soul of traditional Filipino adobo intact.
By the time you serve this dish, your kitchen will smell like a bustling Filipino karinderia, and every bite will deliver that perfect harmony of tangy, savory, and slightly sweet. The pork stays juicy and tender, while the sauce clings to it like a second skin.
Serve it over steamed rice or with sautéed vegetables for a complete meal that’s sure to impress.
This recipe is designed to work with whatever equipment you have—whether you’re using a Dutch oven, slow cooker, or even a sheet pan. The key is patience and precision, but the reward is a dish that tastes like it’s been simmering all day.
Let’s get started on creating your own Filipino-style masterpiece.
Ingredients for adobo pork loin
Pantry staples plus a few Filipino market finds—this is where the magic happens.
| Ingredient | Amount | Notes |
|---|---|---|
| Pork Loin 🥩 | 2 lb | Bone-in for better flavor |
| Cane Vinegar 🍶 | 1 cup | White vinegar works too |
| Soy Sauce 🥢 | ½ cup | Use light soy sauce |
| Garlic Cloves 🧄 | 8 cloves | Peeled and smashed |
| Fresh Ginger 🌿 | 2 tbsp | Finely grated, peeled |
| Brown Sugar 🍚 | ¼ cup | Packed firmly |
| Bay Leaves 🌿 | 2 whole | Dried, for aroma |
| Black Peppercorns 🌶️ | 1 tsp | Crushed lightly |
| Olive Oil 🫒 | 2 tbsp | For searing |
| Salt 🧂 | 1 ½ tsp | Kosher or sea salt |
| Water 💧 | 1 cup | For deglazing |
| Green Onions 🧅 | 3 whole | Sliced, for garnish |
The pork loin should have a good layer of fat—bone-in cuts stay juicier, but boneless works too. Look for thick-cut pork loin at the butcher counter; it’s worth the extra few bucks. For the vinegar, Filipino cane vinegar is ideal, but white vinegar or apple cider vinegar will do in a pinch. I grab mine at Filipino grocery stores like Filipino Mart or Asian Food Grocers, but the regular supermarket stuff works if you’re just starting out. The ginger should smell fresh and zesty—if it’s woody or dull, toss it.
No soy sauce? Coconut aminos work in a bind, though the flavor will be slightly different. Short on brown sugar? White sugar or honey will sweeten things up, but brown sugar’s molasses notes are key here. The garlic and ginger can be minced or grated—food processor for ginger saves time, but a microplane gets you finer texture. If you’ve got Filipino bay leaves (laurel leaves), use those—they’re more aromatic. Regular dried bay leaves are fine, but they’re not quite the same. For extra depth, add a pinch of cinnamon or cloves if you’ve got them.
This sauce gets better with time—reheat gently and add a splash of water if it’s too thick. Keeps in the fridge for 5-6 days or freezes beautifully for 3 months. I like to portion it into glass jars so I can grab individual servings. The pork reheats well too—just warm it through in the sauce. For leftovers, serve over steamed jasmine rice or with garlic fried rice to soak up all that tangy goodness.
Why You'll Love This Recipe
- One-Pan Magic: I swear by this recipe when I’m too tired to wash dishes. The pork loin sits in its own marinade—vinegar, soy, garlic, and ginger—then roasts right on the tray, no extra pans, no fuss.
- Tangy-Savory Balance: That cane vinegar and soy sauce combo? It’s like a flavor explosion in your mouth—sharp, sweet, and umami all at once. The ginger adds this subtle kick that makes it impossible to stop eating.
- Meal Prep Hero: I make a big batch on Sundays and it lasts all week. The leftovers reheat beautifully, whether I’m throwing it in a wrap for lunch or serving it cold in rice bowls.
- Budget-Friendly Feast: Pork loin is affordable, and this recipe stretches it perfectly. A single cut feeds four, and the ingredients won’t break the bank—just a few cloves of garlic, a knob of ginger, and you’re golden.
Step-by-step instructions for Filipino-style braised pork loin
Here's how to create tender, flavorful pork with that signature tangy-sweet adobo profile.
🔥 Step 1: Sear the Pork Loin for Deep Flavor
Heat a large Dutch oven over medium-high heat until hot. Add the 2 tablespoons olive oil and swirl to coat. Pat the 2 lb pork loin dry with paper towels—this ensures maximum browning. Place the pork in the pot and sear for 4-5 minutes per side until deeply golden brown.
Here's the thing—don't move the pork around while searing. Let it develop that beautiful crust undisturbed. You'll know it's ready when it releases easily from the pan. Transfer the pork to a plate and set aside for now. Those browned bits are pure flavor gold.
👨🍳 Step 2: Build the Adobo Marinade
In the same Dutch oven, reduce heat to medium and add the 8 smashed garlic cloves and 2 tablespoons finely grated fresh ginger. Cook for 1 minute until fragrant—this releases their essential oils. Add the 1 cup cane vinegar and scrape up all those browned bits from the bottom with a wooden spoon.
Bring the vinegar mixture to a gentle simmer, then add the 0.5 cup soy sauce, 0.25 cup packed brown sugar, 1.5 teaspoons salt, and 1 teaspoon crushed black peppercorns. Stir until the sugar dissolves completely. Add the 2 whole bay leaves and 1 cup water—this creates our flavorful braising liquid.
🥘 Step 3: Braise Until Fork-Tender
Return the pork loin to the Dutch oven, placing it in the marinade. Pour any accumulated juices from the plate over the pork. Bring everything to a gentle simmer over medium heat, then reduce heat to low. Cover and simmer for 1 hour.
After the initial hour, check the liquid level. If it's reduced too much, add 2-3 tablespoons water to maintain a gentle simmer. The pork is done when it's fork-tender with an internal temperature of 203°F. Here's the secret: the longer it braises, the more flavorful it becomes—don't rush this step.
⏰ Step 4: Rest and Garnish for Perfect Texture
Remove the pork from the braising liquid and transfer it to a cutting board. Let it rest for 10 minutes before slicing. This resting period allows the juices to redistribute throughout the meat, ensuring each bite is moist and flavorful.
While the pork rests, skim off any excess fat from the braising liquid. Strain the liquid through a fine-mesh sieve into a clean saucepan. Bring to a gentle simmer over medium heat and reduce until slightly thickened. Slice the 3 whole green onions and garnish each serving with a sprinkle.
Pro Tips For Making Adobo Pork Loin
- SEAR THE PORK LOIN FIRST: After slicing the pork loin into cutlets, hit them with a screaming-hot pan—no oil needed, the meat’s fat will render. I learned this the hard way: skipping the sear means the vinegar just steams the meat instead of caramelizing.
- PEEL THE GINGER LAST: Add whole ginger slices to the pan first—they’ll infuse flavor without turning to mush. My grandmother swore by this, and she was right: peeled ginger turns to paste in vinegar, while unpeeled slices stay intact and aromatic.
- DON’T DROWN THE PAN: Pour in the soy sauce and vinegar gradually, letting each splash sizzle and reduce before adding more. I used to dump it all at once, and the dish ended up thin and sour—now I build layers of flavor.
- REST THE PORK AFTER COOKING: Let the pork sit under foil for 5-10 minutes—yes, even if you’re impatient like me. This keeps it juicy; cutting into it too soon turns the tender meat into dry, sad slices. (Your future self will thank you.)
Creative variations of adobo pork loin
Slow-Cooker Shortcut
For busy weeknights, toss your seared pork loin into a 6-quart slow cooker with all the marinade ingredients. Cook on low for 6-7 hours or high for 3-4 hours—no need to stir.
The pork becomes so tender it practically falls apart. I use my Hamilton Beach slow cooker with the lid slightly ajar in the last 30 minutes to thicken the sauce naturally. 💫
Grilled Adobo Crust
After braising, transfer the pork to a hot grill or grill pan for 3-4 minutes per side to create a smoky char. Brush with extra marinade first to prevent sticking. This method adds a caramelized crust while keeping the interior juicy.
I love doing this on my Weber Original Kettle—the crosshairs sear marks look amazing on the plate. Pair with grilled pineapple for a tropical twist.
Spicy Filipino Twist
Add 1 tablespoon siling labuyo (Filipino chili) or 1-2 teaspoons cayenne pepper to the marinade for heat. For extra depth, include 1 teaspoon ground black pepper and ½ teaspoon cinnamon. The vinegar balances the spice beautifully.
If you can't find siling labuyo, fresh Thai bird's eye chilies work perfectly. I like to serve this version with coconut rice to cool the palate.
Sweet Potato Mash
Roast 2 cups cubed sweet potatoes (tossed in 1 tbsp olive oil and ½ tsp salt) at 400°F for 25 minutes while the pork braises. Mash with 2 tbsp butter and ¼ cup coconut milk for a creamy side that complements the tangy pork.
The natural sweetness of the sweet potatoes cuts through the vinegar's acidity beautifully. 🍠
Coconut Milk Finish
For a richer sauce, stir ½ cup coconut milk into the reduced adobo liquid at the end. Simmer for 2 minutes until slightly thickened. This adds a luxurious creaminess that pairs perfectly with the pork's bold flavors.
I use full-fat canned coconut milk for the best texture. Garnish with toasted coconut flakes for an extra tropical touch.
Meal Prep Adaptation
Double the recipe and store components separately for 5 days of easy meals. Keep the braised pork in its sauce in an airtight container and reheat with 1 tbsp water to loosen. Cook rice and sauté veggies fresh each time.
I portion the sauce into glass jars with the pork slices layered on top—just reheat and serve. Perfect for busy mornings when you need a hearty lunch ready in minutes. ⏰
Nutrition facts
Frequently asked questions
Can I use regular white vinegar instead of cane vinegar?
Yes! While Filipino cane vinegar adds a subtle sweetness, white vinegar works perfectly fine. The acidity is what matters most for tenderizing the meat. For extra depth, add 1 teaspoon brown sugar to compensate for the lack of cane vinegar's natural sweetness.
How do I know when the pork loin is fully cooked?
Use a meat thermometer to check the internal temperature—it should reach 203°F for perfectly tender pork. The meat should also pull apart easily with a fork. If you don't have a thermometer, cut into the thickest part; the juices should run clear, not pink.
Can I make this recipe in a slow cooker?
After searing the pork, transfer everything to a 6-quart slow cooker and cook on low for 6-7 hours or high for 3-4 hours. The slow cooking enhances the tenderness. For extra flavor, remove the lid for the last 30 minutes to thicken the sauce naturally.
What’s the best way to store leftovers?
Store the pork and sauce together in an airtight container in the fridge for up to 5 days. Reheat gently with 1 tablespoon water to loosen the sauce. For longer storage, freeze for 3 months. The flavors actually improve over time!
Why does my adobo sauce turn cloudy?
Cloudiness happens when the sauce cools and the oils separate—it’s normal! Just reheat gently until smooth. For a glossier finish, skim excess fat before serving. If the sauce is too thin, simmer uncovered for 5-10 minutes to reduce it. The pork’s flavor stays intact!