
Main Courses
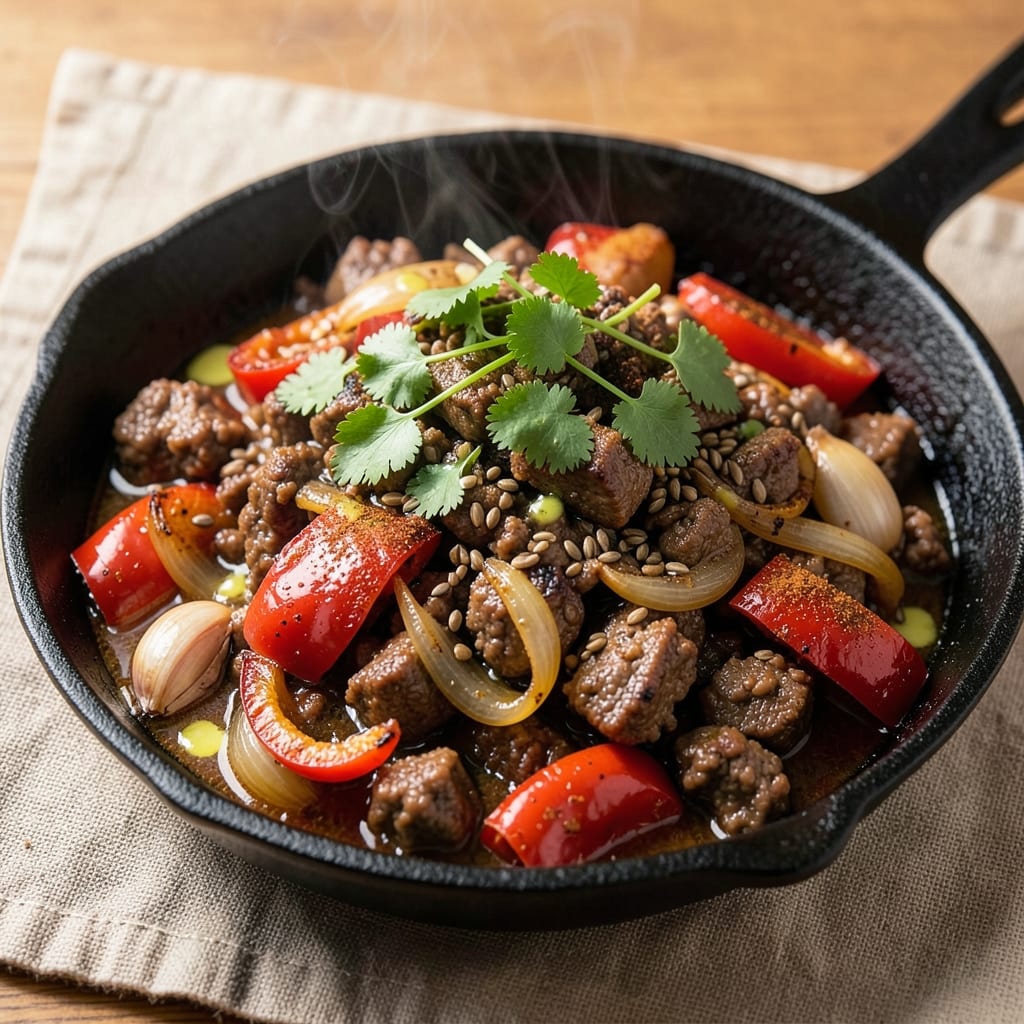
This beef and pork chilli recipe delivers the kind of smoky depth and layered heat that turns weeknight dinners into memorable meals. 🔥 After years of perfecting the balance between tender proteins and complex spices, I've developed a method that transforms tough cuts into melt-in-your-mouth perfection while building rich, aromatic flavors. The secret lies in slow-cooking the meat until it practically falls apart, then letting the spices and tomatoes meld into a sauce that's both hearty and refined.
What makes this chilli truly special is the combination of beef and pork—ground chuck for texture and pork shoulder for juiciness—seared first to develop a deep, caramelized crust before simmering in a blend of chili powder, cumin, and smoked paprika. I've found that using a mix of dried and fresh chili peppers creates both immediate heat and lingering smokiness, while a splash of beer or broth at the end rounds out the flavors beautifully. The result is a chilli that's robust enough to stand alone but versatile enough to pair with cornbread, rice, or tortilla chips.
By the time you're done, you'll have a pot of chilli that's restaurant-quality—deep red in color, packed with tender meat, and bursting with flavor in every bite. The texture is perfect: fork-tender proteins suspended in a thick, slightly sticky sauce that clings to each spoonful. This isn't just a chilli; it's a meal that brings comfort and warmth to the table, whether you're feeding a crowd or treating yourself to a cozy solo dinner.
The best part? This recipe scales effortlessly—double it for leftovers that taste even better the next day, or halve it for a smaller gathering. The technique is foolproof, but the results are anything but ordinary. Let's get cooking, and I'll show you exactly how to achieve that perfect balance of heat, texture, and depth that makes this chilli unforgettable.
Ingredients for beef and pork chilli
Sixteen ingredients that transform tough cuts into restaurant-quality chilli with smoky depth and layered heat.
| Ingredient | Amount | Notes |
|---|---|---|
| Ground Beef Chuck 🥩 | 1 ½ lb | 80% lean, coarse texture preferred |
| Pork Shoulder 🐖 | 1 ½ lb | Cut into 1-inch chunks |
| Yellow Onion 🧅 | 1 whole | Diced, medium size |
| Garlic Cloves 🧄 | 6 cloves | Minced, fresh preferred |
| Dried Chili Powder 🌶️ | 3 tbsp | Ancho or chipotle blend ideal |
| Ground Cumin 🌿 | 1 ½ tbsp | Toasted for deeper flavor |
| Smoked Paprika 🌶️ | 1 tbsp | For authentic smokiness |
| Dried Oregano 🍃 | 1 tsp | Mexican oregano preferred |
| Cayenne Pepper 🔥 | ½ tsp | Adjust for heat preference |
| Tomato Paste 🍅 | 2 tbsp | Smooth, no sugar added |
| Canned Tomato Sauce 🍅 | 2 cups | San Marzano preferred |
| Beer 🍺 | 1 cup | Dark ale or stout preferred |
| Beef Broth 💧 | 1 ½ cups | Low-sodium preferred |
| Fresh Jalapeño 🌶️ | 1 whole | Seeds removed, minced |
| Salt 🧂 | 1 ½ tsp | Kosher or sea salt |
| Black Pepper 🌶️ | ½ tsp | Freshly ground preferred |
| Fresh Cilantro 🌿 | ¼ cup | Chopped, for garnish |
The beef and pork are the stars here, and quality matters. Costco or Trader Joe's carry excellent ground chuck—look for 80% lean or higher, as the fat renders down to create that rich sauce. Pork shoulder should have visible marbling for juiciness. If you're buying whole cuts, ask the butcher to grind them fresh. For the spices, Penzeys or the bulk section at Whole Foods have the best blends, but regular grocery store chili powder works in a pinch. Toast your cumin seeds in a dry pan for 30 seconds before grinding—game-changer for flavor.
No dark beer? Substitute with extra beef broth—just add 1/2 cup more. Fresh jalapeño too spicy? Swap for 1/2 tsp red pepper flakes. Short on tomato sauce? Crushed tomatoes in a can work just as well. The tomato paste can be a squeeze tube from Trader Joe's if you hate measuring—just eyeball it close. For extra smokiness, add 1/2 tsp of liquid smoke (trust me, it disappears into the sauce). The San Marzano tomatoes are worth the splurge—they're sweeter and more flavorful than regular canned tomatoes, but any quality brand will do.
This chilli tastes even better the next day, so make a double batch. Store in airtight containers in the fridge for 4-5 days or freeze for up to 3 months. I like to portion it into meal-sized containers for easy lunches. The fresh cilantro can be added right before serving—it keeps best in a sealed container with a damp paper towel. If you're prepping ahead, freeze the meat mixture separately and cook it fresh when ready to serve for maximum tenderness.
Why You'll Love This Recipe
- One-Pot Magic: I swear by this recipe—just brown the meats in one pot, toss in the onions and garlic, then let the chili powder work its magic while you do the dishes. No extra pans, no stress.
- Deep, Smoky Kick: That combo of beef chuck and pork shoulder? Rich, tender, and packed with flavor. The dried chili powder adds heat without overpowering, and the garlic? Oh, it lingers in the best way.
- Game Day Gold: Between us, this chili is my go-to for tailgates, movie nights, or whenever I need something hearty that feeds a crowd. Serve it with cornbread or over rice—either way, it’s a win.
- Budget-Friendly Powerhouse: Ground beef and pork shoulder stretch so far, and the onions and garlic add freshness without breaking the bank. Plus, leftovers taste even better the next day—if there are any left.
Step-by-step instructions for beef and pork chili
Here's how to build bold, smoky chili with perfect meat texture and layered heat.
🔥 Step 1: Brown the Meats for Deep Flavor
Heat a large Dutch oven over medium-high heat until hot. Add the 1.5 lb ground beef chuck and cook, breaking it apart with a wooden spoon, until it loses its raw color and starts to brown—about 5-6 minutes. This step develops the rich, meaty foundation.
Transfer the beef to a plate and repeat with the 1.5 lb pork shoulder cut into 1-inch chunks. Cook until golden brown on all sides—about 6-8 minutes. Here's the thing—don't rush this. Browned meat equals flavor-packed chili. If your pan gets too crowded, work in batches.
👨🍳 Step 2: Build the Flavor Base
Reduce heat to medium and add the diced yellow onion to the same Dutch oven. Cook for 5-6 minutes until softened and translucent. Add the 6 minced garlic cloves and cook for another 30 seconds until fragrant—don't let it burn.
Stir in the 2 tbsp tomato paste and cook for 1 minute to deepen its flavor. This creates a rich, concentrated base that prevents the chili from tasting watery. Sprinkle in the 3 tbsp dried chili powder, 1.5 tbsp ground cumin, 1 tbsp smoked paprika, 1 tsp dried oregano, 0.5 tsp cayenne pepper, 1.5 tsp salt, and 0.5 tsp black pepper. Stir everything together so the spices coat the meat and onions.
🍳 Step 3: Simmer the Chili to Perfection
Return the browned meats to the pot along with the 2 cups canned tomato sauce, 1 cup beer, and 1.5 cups beef broth. Stir well to combine, then add the minced jalapeño (seeds removed for less heat). Bring everything to a gentle boil, then reduce heat to low and let it simmer uncovered for 1.5 hours.
Here's where patience pays off. The chili should thicken gradually as moisture evaporates. Stir occasionally and taste after 45 minutes—this is when you can adjust seasoning if needed. The flavors will meld beautifully, creating that perfect balance of smoky, spicy, and savory. Don't skip this simmering time—it's what transforms good chili into great chili.
🥘 Step 4: Finish and Garnish
After 1.5 hours, taste the chili and adjust seasoning if needed. It should be rich, flavorful, and perfectly balanced—not too salty, not too bland. Stir in the 0.25 cup chopped fresh cilantro just before serving to brighten the flavors with a fresh, herbal note.
Ladle the chili into bowls and serve immediately with your favorite toppings—crusty bread, shredded cheese, or a dollop of sour cream. The aroma alone will have everyone gathering around the table. This chili delivers on all the promises: deep smoky flavor, layered heat, and that perfect meaty texture that makes it worth the wait.
Pro Tips For Making Beef And Pork Chilli
- Brown the Meat Slowly: I used to rush this step and ended up with greasy chili—don’t. Break the beef chuck and pork shoulder into small chunks, then spread them in a single layer over medium-low heat. Let them sear undisturbed for 3-4 minutes until deeply browned before stirring. That crust? It’s what carries the flavor through the whole pot. ---
- Sweat the Onions Properly: The onion isn’t just filler—it’s the base. Dice it fine (1/4-inch pieces) and cook it in the same pot with the meat until it’s translucent and slightly sticky, about 8-10 minutes. If it’s still crunchy, you’re not done. My grandmother swore by this, and she was right: soft onions make a smoother chili. ---
- Don’t Crowd the Garlic: After the onions, add minced garlic but keep the heat low. If you dump in too much at once, it burns before it infuses. I learned this the hard way—now I add it in batches, waiting 30 seconds between each, until it’s just fragrant, not crispy. Burnt garlic ruins everything. ---
- Simmer, Don’t Boil: Once everything’s in the pot, bring it to a gentle simmer—not a rolling boil. Too much heat makes the pork shoulder tough, and the chili powder loses its depth. Cover it and let it bubble quietly for at least 1.5 hours. I know, I know, but trust the process—your future self will thank you.
Storing and reheating your beef and pork chilli
Refrigerator Magic
Let your chili cool completely before transferring to airtight glass containers—I swear by Pyrex with snap lids for even storage. Store at 40°F or below for up to 5 days, but honestly? The flavors get even better after 24 hours as the spices meld. Pro tip: Press plastic wrap directly on the surface before sealing to prevent that dreaded skin from forming. 💫
Freezer Longevity
For long-term storage, divide chili into quart-sized freezer bags (leave 1-inch headspace for expansion) or glass containers. Label with the date—this chili stays peak quality for 3 months. When ready to eat, thaw overnight in the fridge or use the microwave defrost setting (stir halfway through). I always freeze portions with cilantro added—it stays vibrant surprisingly well!
Stovetop Revival
My go-to method is low-and-slow reheating on the stove. Pour chili into a heavy-bottomed pot, add ¼ cup beef broth, and simmer on low heat for 15-20 minutes. Stir occasionally—this prevents scorching and lets flavors rebalance. Taste before serving; you might need a pinch of salt or black pepper to refresh the seasoning. 🔥
Microwave Shortcut
For quick lunches, microwave 1-2 cups at a time in a microwave-safe bowl on 50% power for 3-4 minutes, stirring once. Add a splash of beer or broth if it looks dry. The microwave kills some texture, so I only use this for leftovers, not freshly made chili. Always check internal temperature reaches 165°F for safety.
Garnish Like a Pro
Fresh cilantro and jalapeño are best added right before serving—they keep chili vibrant. For extra flair, top with crumbled queso fresco, sour cream, or avocado slices. I also love a sprinkle of smoked paprika for that restaurant-quality finish. The presentation makes all the difference when serving to guests!
Make-Ahead Mastery
Prep ahead by browning the meats and building the flavor base a day in advance. Store in the fridge until ready to simmer—this saves 30 minutes of active cooking time. For meal prep, portion into individual containers with a side of rice or tortilla chips. The chili reheats beautifully, making it perfect for busy weeknights. 💡
Nutrition facts
Frequently asked questions
Why combine beef and pork in chili?
The beef provides a rich, hearty texture from the ground chuck, while pork shoulder adds juiciness and depth of flavor. Together, they create a perfect balance—beef gives structure while pork contributes fat that keeps the chili luscious. This combo is especially popular in Texas-style chili where meaty richness is key.
Can I make this chili in a slow cooker?
Brown the meats first in a skillet, then transfer everything to your slow cooker. Cook on low for 6-7 hours or high for 3-4 hours. The slow cooker method actually enhances the flavors by allowing them to meld even more. Just add ½ cup broth if it gets too thick during cooking.
How do I adjust the heat level?
For milder heat, reduce the cayenne to ¼ tsp or omit it entirely. For extra spice, add ½ tsp more cayenne or stir in 1-2 chopped fresh serrano peppers with the jalapeño. Always taste the chili before serving—you can always add more heat, but you can't take it out!
What's the best way to serve this chili?
This chili works beautifully with warm cornbread, steamed white rice, or crusty bread for dipping. For a complete meal, serve with toppings like shredded cheese, sour cream, avocado slices, and pickled jalapeños. The smoky flavors pair perfectly with a cold Mexican lager or glass of red wine.
What if my chili is too thin?
Simmer uncovered for 10-15 more minutes to reduce the liquid. If it's still too thin, mix 1 tbsp cornstarch with 2 tbsp cold water, stir into the chili, and simmer for 5 more minutes. Never use flour—it can make the chili taste gritty. For prevention, always use tomato paste and simmer uncovered from the start.