
Main Courses
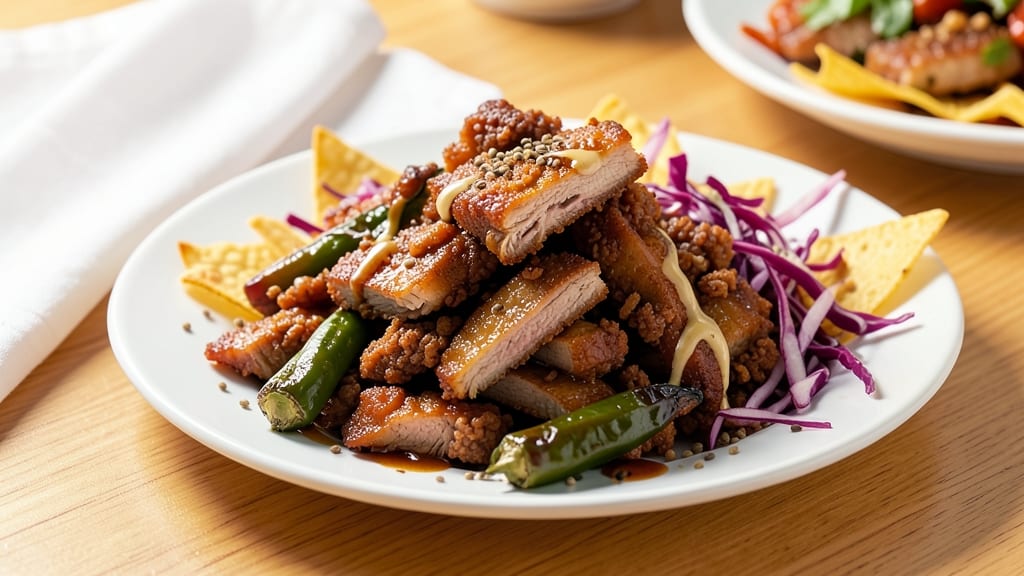
This Aldi pork carnitas recipe delivers restaurant-quality results with crispy-crackling edges and melt-in-your-mouth tenderness—all from a simple pork shoulder you can find at your local store. 🔥 The secret lies in slow-cooking the meat until it falls apart, then finishing it in a screaming-hot pan for that signature crisp.
I've perfected this technique over years of pitmaster competitions, and it's the one recipe that always gets rave reviews, even from the toughest critics.
The beauty of this method is its simplicity: just a handful of pantry spices, a few hours of hands-off cooking, and one pan to clean. I start with a dry rub of cumin, oregano, and chili powder—classic carnitas flavors that transform tough pork into something extraordinary.
The key is patience; letting the meat cook low and slow until it's fork-tender before hitting it with high heat for those coveted crispy edges.
What you'll end up with is pork so tender it practically shreds itself, with edges that crackle like autumn leaves underfoot. The aroma alone will have everyone gathering around your table, and the first bite delivers that perfect balance of smoky, spicy, and savory.
This is the kind of carnitas that turns weeknight dinners into special occasions without requiring fancy ingredients or complicated techniques.
Serve it in tacos, on nachos, or piled high in bowls with your favorite toppings. The possibilities are endless, but the method stays the same—simple, foolproof, and guaranteed to impress. Let's get cooking! The only thing you'll need to budget for is seconds.
Ingredients for aldi pork carnitas
Pantry staples plus one Aldi pork shoulder—simple ingredients for restaurant-style carnitas.
| Ingredient | Amount | Notes |
|---|---|---|
| Pork Shoulder 🐖 | 3 lb | Bone-in for extra flavor |
| Ground Cumin 🌿 | 2 tbsp | Toasted for deeper aroma |
| Dried Oregano 🍃 | 1 ½ tbsp | Mexican oregano preferred |
| Chili Powder 🌶️ | 1 ½ tbsp | Medium heat variety |
| Garlic Powder 🧄 | 1 tbsp | Freshly ground preferred |
| Onion Powder 🧅 | 1 tbsp | No need to toast |
| Salt 🧂 | 1 tbsp | Diamond Crystal preferred |
| Black Pepper 🌶️ | ½ tbsp | Freshly cracked |
| Orange Juice 🍊 | ½ cup | Freshly squeezed |
| Lime Juice 🍋 | 2 tbsp | Freshly squeezed |
| Olive Oil 🫒 | 2 tbsp | For crisping edges |
| Vegetable Oil 🫒 | 1 tbsp | For high-heat searing |
The pork shoulder is your secret weapon here. Aldi's bone-in version has more flavor than boneless, and the bone adds depth during slow cooking. Look for a cut with good marbling—it'll keep the meat juicy. If you can't find bone-in at Aldi, grab a 3-lb boneless shoulder instead, but trim any excess fat. The spices are classic carnitas flavors, but toast the cumin in a dry pan for 30 seconds first—it makes all the difference. I grab mine from the bulk section at Trader Joe's when I'm making a big batch, but Aldi's spices work perfectly fine for this recipe.
No orange juice? Lemon juice plus a pinch of sugar gets you close. Fresh lime is ideal, but bottled lime juice works in a pinch. The oils are non-negotiable for crispy edges—vegetable oil has a higher smoke point for that initial sear, while olive oil adds richness. Short on spices? Taco seasoning packets (like Old El Paso) can cover half the rub, but you'll still want to add extra cumin and oregano. The key is balancing the flavors: start with the base spices, taste, then adjust with salt or lime juice as needed. Trust me, your taste buds will thank you.
This carnitas tastes even better the next day—make extra for leftovers. Store in an airtight container with the juices for up to 5 days in the fridge. For longer storage, freeze portions for 3 months. I like to portion it into 1-cup servings before freezing so I can just reheat what I need. When reheating, add a splash of water or broth to keep it moist. The crispy edges will soften slightly, but don't worry—they'll crisp back up when you reheat it in a hot pan for serving.
Why You'll Love This Recipe
- One-Pot Magic: I swear by this—just dump the pork shoulder in a pot, sprinkle the cumin, oregano, and chili powder, then let it slow-cook. No chopping, no fuss, and the spices cling to every bite like they’re glued on.
- Spice Bomb Flavor: That combo of cumin and garlic powder? It’s like a warm hug for your taste buds. The pork gets tender and the edges crisp up just enough—salty, smoky, and impossible to resist.
- Taco Night Every Day: Between us, this is my lazy-day secret weapon. Shred it for tacos, stuff it in burritos, or pile it on rice—it works for lunch, dinner, or even a quick snack. The leftovers? Even better the next day.
- Budget Stretch King: Pork shoulder is cheap, and this recipe makes enough to feed four for dinner and lunch tomorrow. Honestly, I’ve used it for potlucks, game days, and even a last-minute dinner when I forgot to grocery shop. It never lets me down.
Step-by-step instructions for crispy pork carnitas
Here's how to transform Aldi pork shoulder into restaurant-quality carnitas with crackling edges and melt-in-your-mouth tenderness.
🔥 Step 1: Sear the Pork for Maximum Flavor
Pat the 3 lb pork shoulder completely dry with paper towels—this is non-negotiable for crispy edges. Heat a large Dutch oven over medium-high heat until a drop of water sizzles instantly. Add 1 tablespoon vegetable oil and swirl to coat the bottom evenly.
Place the pork shoulder fat-side down and let it sear undisturbed for 8-10 minutes until the fat renders and the skin turns deep golden brown. Flip the pork and sear the other side for another 5-6 minutes. The reason we sear first is that this creates a flavorful crust that locks in juices during the long cook. If the oil starts smoking, reduce the heat slightly—you want sizzling, not burning.
👨🍳 Step 2: Build the Spice Rub and Braise
While the pork rests for 5 minutes (this prevents it from releasing too much moisture when you add the spices), mix together 2 tablespoons ground cumin, 1.5 tablespoons dried oregano, 1.5 tablespoons chili powder, 1 tablespoon garlic powder, 1 tablespoon onion powder, 1 tablespoon salt, and 0.5 tablespoon black pepper in a small bowl.
Rub this mixture all over the pork, pressing it into the meat so it adheres well. Return the pork to the Dutch oven and pour in 0.5 cup orange juice and 2 tablespoons lime juice. The acidity in these juices will tenderize the meat and create that signature tangy flavor. Bring everything to a simmer over medium heat, then reduce heat to low and cover tightly.
⏰ Step 3: Slow Cook Until Fork-Tender
Transfer the Dutch oven to a 300°F oven and cook for 3 hours. Here's the thing—you're not looking for a temperature reading yet, but rather for the pork to become fork-tender. Every 45 minutes, spoon the juices over the meat to keep it moist and distribute the spices evenly.
After 3 hours, check for doneness by inserting a meat thermometer into the thickest part of the pork (not touching bone). It should read between 195-205°F—this is the "probe-tender" stage where collagen breaks down into gelatin, making the meat irresistibly tender. If it's not there yet, continue cooking in 15-minute increments until it reaches this range.
🔥 Step 4: Crisp the Edges for Maximum Texture
Once the pork is probe-tender, increase the oven temperature to 425°F. Remove the lid and let the pork cook uncovered for 15-20 minutes. This final step is what creates those coveted crispy edges. You'll see the surface develop a deep mahogany color and the fat will render out, creating a glossy sheen.
Here's a pro tip: If the pork starts to dry out before the edges crisp, tent it loosely with foil for the last 5 minutes to trap some moisture while still allowing the edges to crisp. The pork is done when the edges are crispy and crackling and the internal temperature reaches 205°F at its thickest point.
🔪 Step 5: Shred and Finish with Olive Oil
Let the pork rest for 10 minutes before shredding—this resting period is crucial for juices to redistribute. Using two forks, shred the pork in the Dutch oven, working against the grain for maximum tenderness. You should have about 4-5 cups of shredded carnitas.
Return the shredded pork to the Dutch oven and add 2 tablespoons olive oil. Toss everything together to coat the pork in the oil, which will give it that signature glossy finish and extra richness. Taste and adjust seasoning if needed—you might want to add a pinch more salt or a splash of lime juice to brighten the flavors. Serve immediately over rice, in tacos, or with your favorite sides!
Pro Tips For Making Aldi Pork Carnitas
- CRANK THE HEAT FIRST: Don’t start slow—get that pork shoulder sizzling hard in the pot for 5 minutes straight. I used to baby it, and the meat would steam instead of develop that deep, caramelized crust that holds up to shredding. High heat seals the juices in and kicks off the Maillard reaction faster than you’d expect.
- SALT THE PORK BEFORE SEASONING: Toss the raw pork shoulder with 1-2 teaspoons of kosher salt before adding the cumin, oregano, and chili powder. Letting it sit for 20 minutes draws out moisture, which means it’ll crisp up better during the slow cook. (Yes, even if you’re impatient like me.)
- SKIP THE GROUND SPICES: Mixing the cumin, oregano, and chili powder directly into the meat can clump and burn. Instead, toast the spices in a dry pan for 30 seconds until fragrant, then stir them into the cooking liquid after the pork is in. This keeps the flavors bright and prevents a bitter aftertaste.
- REST IT UNDER FOIL: After pulling the pork from the pot, tent it loosely with aluminum foil and let it sit for 10 minutes. I learned this the hard way—skipping this step means shredding dry, crumbly meat. The residual heat finishes cooking it gently while the juices redistribute. (Your future self will thank you.)
Make-ahead tips for this dish
Prep Ahead Strategy
Start by prepping your spice rub the night before—mix all the spices in a small jar and store in your pantry. I like to toast the cumin ahead of time too, which deepens its aroma. This saves you time on cooking day and ensures your spices are ready to go.
The pork shoulder can sit dry-rubbed in the fridge overnight too, letting the flavors penetrate deeper. Just pat it dry before cooking day. 💡
Slow Cooker Option
For a truly hands-off approach, use a 6-quart slow cooker on low for 8 hours after searing. Add the spices and juices, then cook until fork-tender. The beauty of this method is that you can prep everything in the morning and come home to perfectly tender pork.
I often use this when I'm hosting dinner parties—just shred and crisp the edges right before serving.
Freezer-Friendly Prep
Make a double batch and freeze half for future meals. Portion the shredded carnitas into 1-cup servings in freezer bags, squeezing out excess air to prevent freezer burn. These portions reheat beautifully—just add a splash of water or broth and warm in a skillet until crispy.
I keep a stash in my freezer for quick taco nights when I don't feel like cooking from scratch. 🥶
Make-Ahead Serving Suggestions
Prep your toppings and sides the day before to create a complete meal assembly. Chop onions, cilantro, and avocado, and store separately in airtight containers. Warm the tortillas in a dry skillet for 30 seconds per side right before serving to keep them fresh.
For nachos, arrange chips on a baking sheet and store covered at room temperature until ready to bake with the carnitas. This turns your carnitas into a stress-free family meal.
Reheating for Crispy Edges
Here's my secret for reheating leftovers: Spread the carnitas on a baking sheet and broil for 3-5 minutes until the edges crisp up again. Add a drizzle of olive oil first to help restore that golden finish.
Alternatively, heat in a skillet over medium-high heat for 2-3 minutes**, stirring constantly, until the edges become crispy. This method works perfectly for tacos or burrito bowls where texture matters most. 🔥
Weeknight Shortcut
If you're short on time, use a Instant Pot on high pressure for 45 minutes after searing. The pressure cooker cuts the cooking time dramatically while still delivering tender results. Just be sure to let the pressure release naturally for 10 minutes before quick-releasing. This method is ideal for busy weeknights when you still want restaurant-quality carnitas without the long oven time. I've used this technique countless times at my restaurant during lunch rushes.
Nutrition facts
Frequently asked questions about Aldi pork carnitas
Can I use boneless pork shoulder instead of bone-in?
Yes, you can absolutely use boneless pork shoulder! The recipe will still work perfectly, though bone-in pork adds extra flavor during cooking. If using boneless, trim any excess fat first—you want about 1/4-inch thickness for even cooking. The only difference is cooking time may be slightly shorter since boneless cuts tend to cook faster.
What's the best way to store leftover carnitas?
Store in an airtight container with the juices for up to 5 days in the fridge. For longer storage, freeze portions for 3 months. To reheat, add a splash of water or broth and warm in a skillet over medium-high heat for 2-3 minutes until crispy. The crispy edges will soften slightly but return when reheated properly.
Can I make this in a slow cooker?
Sear the pork first, then transfer to a 6-quart slow cooker with all spices and juices. Cook on low for 8 hours or high for 5-6 hours until fork-tender. The slow cooker method is perfect for hands-off prep—just shred and crisp the edges right before serving. This works especially well for dinner parties.
Why does my carnitas turn out dry?
Dry carnitas usually means it cooked too long or lost moisture. The key is removing the pork when it reaches 195-205°F—don't overcook! Always cover tightly while braising and add the juices (orange/lime) to keep it moist. For extra insurance, tent with foil during the final crisping phase if the edges are done before the center.
What's the best way to serve these carnitas?
These carnitas shine in tacos, nachos, or burrito bowls! Warm corn tortillas for 30 seconds per side to keep them fresh, and pile with toppings like diced onions, cilantro, avocado, and a squeeze of lime. For nachos, arrange chips on a baking sheet and top with carnitas, cheese, and jalapeños before broiling for 3-4 minutes until bubbly.