
Main Courses
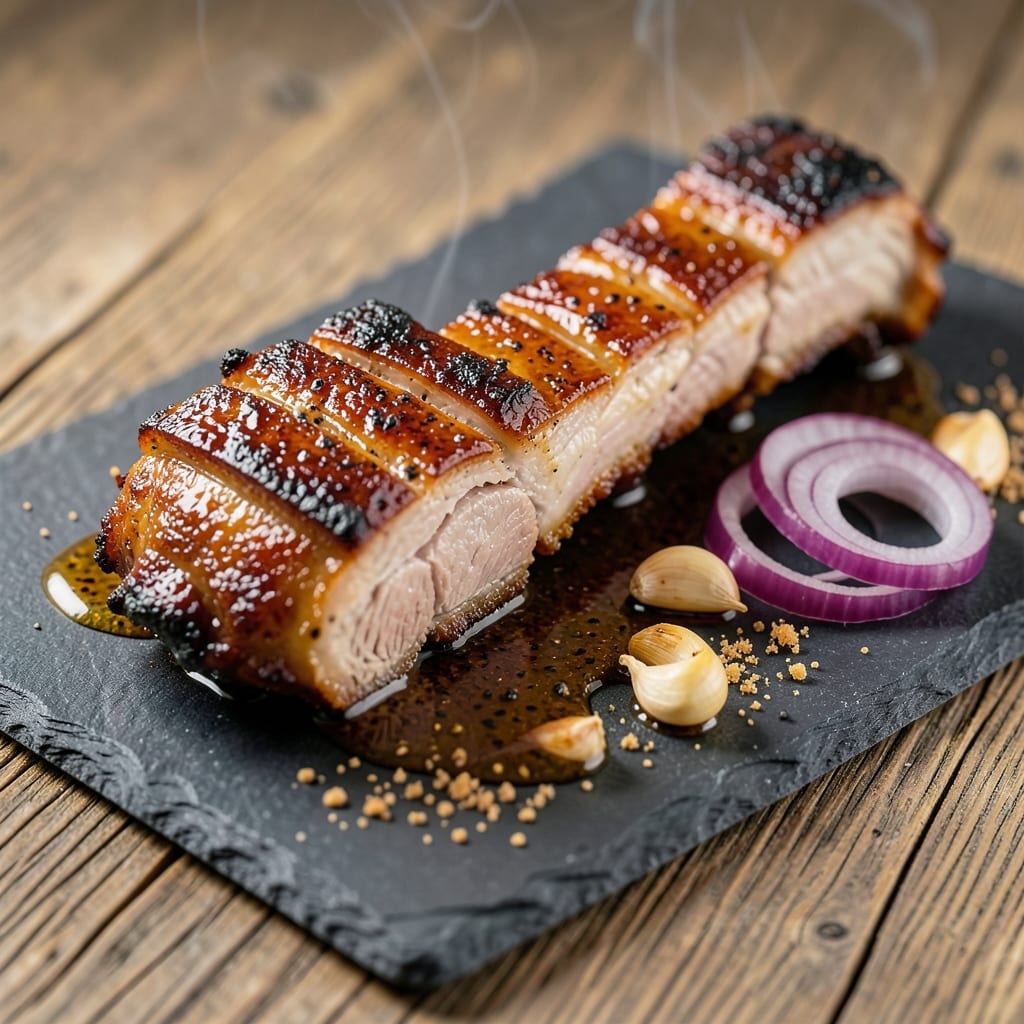
This BBQ pork backbone recipe delivers the ultimate combination of smoky crisp bark and fall-off-the-bone tenderness—the kind of dish that transforms a simple cookout into a showstopper. 🔥 I've spent years perfecting this technique, blending my French training with classic pitmaster methods to create a cut that's both impressive and foolproof. The secret lies in precise temperature control and a well-balanced rub that builds flavor without overpowering the natural richness of the meat.
What makes this recipe special is the balance between high-heat searing and low-and-slow cooking. We start with a hot grill or smoker to develop that coveted crispy bark, then transition to a gentle 225°F finish that renders fat and breaks down connective tissue. The result? A backbone that's juicy, flavorful, and packed with that irresistible snap at every bite. This isn't just another BBQ recipe—it's a technique that turns tough cuts into something extraordinary.
By the time you're done, you'll have a centerpiece dish that's restaurant-quality but made in your own backyard. The bark will be dark, crackling, and loaded with caramelized spices, while the meat inside will be so tender it practically melts when you cut into it. This is the kind of meal that has your guests asking for the recipe—and begging you to make it again. The best part? It's a technique that works equally well on a high-end smoker or a simple backyard grill.
Serve with classic BBQ sides like creamy coleslaw and buttery cornbread to complete the meal. The rich, smoky flavors of the pork backbone pair perfectly with these staples, creating a spread that feels both comforting and impressive. Let's get started on creating your next BBQ masterpiece.
Ingredients for bbq pork backbone
Six ingredients transform tough pork into a smoky, crisp-barked masterpiece—nothing fancy, just pure technique.
| Ingredient | Amount | Notes |
|---|---|---|
| Pork Backbone 🍖 | 2 lb | Fresh cut, fat cap intact |
| Yellow Onion 🧅 | 1 whole | Large, sliced into rings |
| Garlic Cloves 🧄 | 8 cloves | Fresh, peeled and smashed |
| Brown Sugar 🍚 | ½ cup | Light or dark, packed |
| Smoked Paprika 🌶️ | 2 tbsp | High quality for depth |
| Ground Black Pepper 🌶️ | 1 ½ tbsp | Freshly cracked, coarse |
| Kosher Salt 🧂 | 1 tbsp | Diamond Crystal preferred |
| Mustard Powder 🍯 | 1 tsp | Yellow or Dijon blend |
| Ground Cumin 🌿 | 1 tsp | Toasted for warmth |
| Apple Cider Vinegar 🍎 | ¼ cup | For tangy balance |
| Yellow Mustard 🍯 | ¼ cup | Smooth, not spicy |
| Honey 🍯 | ¼ cup | Wildflower preferred |
| Wood Chips 🌳 | 2 cups | Hickory or oak preferred |
| Beef Broth 🍲 | ½ cup | Low sodium, for moisture |
The pork backbone is the star—look for cuts with a thick fat cap, which renders beautifully during cooking. Local butcher shops often carry these, or ask your grocery store's meat department to special-order. If you can't find a whole backbone, two pork ribs with the spine intact work too. The fat cap isn't just for flavor—it creates that coveted crispy bark when seared. Costco sometimes stocks these during summer months, but I've also seen them at Whole Foods in their specialty meat section. If your cut feels dry or lacks marbling, ask for a different piece—this isn't the time for lean pork.
No smoked paprika? Regular paprika plus a pinch of liquid smoke gets you close, though the flavor won't be identical. Swapping brown sugar for white? Add 1/4 tsp baking soda to help with caramelization. The apple cider vinegar can be subbed with lemon juice, but you'll lose some of that deep, tangy complexity. For the mustard, Dijon works too—just reduce the amount to 1/4 cup. The wood chips are non-negotiable for that authentic smoky flavor, but if you're in a pinch, smoked salt at 1/2 tsp adds a hint of depth. The beef broth keeps the meat moist during the low-and-slow phase—low-sodium versions prevent over-salting.
Prep the rub ahead and store it in an airtight container for up to 3 months—it's perfect for quick rubs on other cuts. The backbone keeps beautifully in the fridge for 3-4 days once cooked, but reheating is tricky—wrap in foil and warm in a 275°F oven for 20 minutes. For leftovers, slice between the vertebrae and serve on buns with pickles. The wood chips? Soak them in water for 30 minutes before using—this prevents flare-ups and gives you better smoke control. If you're not using them all, store the rest in a sealed bag in the freezer for up to 6 months.
Why You'll Love This Recipe
- One-Pan Magic: I swear by this recipe—just toss the pork backbone, sliced onions, and garlic into a pan, add the spices, and let it slow down. No flipping, no fussing, just hands-off cooking that still delivers big flavor.
- Sweet-Smoky Bomb: That combo of brown sugar and smoked paprika? It’s like a flavor hug for your taste buds. The backbone stays tender while the edges get that sticky, caramelized crust that makes every bite worth it.
- Weeknight Crowd-Pleaser: Between us, this is my go-to for game days or lazy Sundays. The rich, smoky taste hits the spot, and it’s the kind of dish where even picky eaters reach for seconds—no one turns it down.
- Budget-Friendly Feast: Pork backbone is cheaper than you’d think, and a single roast feeds four (or fills my fridge for leftovers). Honestly, I’ve had this for lunch the next day, and it’s just as good cold—maybe even better with a side of pickles.
Step-by-step instructions for smoky pork backbone
Here's how to transform tough pork backbone into melt-in-your-mouth perfection with that coveted crispy bark.
👨🍳 Step 1: Prepare the Dry Rub and Marinate the Pork
In a medium bowl, combine the 0.5 cup brown sugar, 2 tbsp smoked paprika, 1.5 tbsp ground black pepper, 1 tbsp kosher salt, 1 tsp mustard powder, and 1 tsp ground cumin. Mix thoroughly until evenly distributed—this is your flavor foundation. The brown sugar will caramelize beautifully during cooking, creating that signature bark.
Pat the 2 lb pork backbone dry with paper towels (moisture is the enemy of crispy skin) and generously coat it with the rub mixture, pressing it into every crevice. Place the rubbed pork in a resealable plastic bag and refrigerate for at least 4 hours or overnight. This extended marinating ensures deep flavor penetration and tenderizes the meat. Pro tip: Turn the bag occasionally for even coating.
🔥 Step 2: Set Up Your Smoker for Low-and-Slow Cooking
Soak the 2 cups wood chips (hickory or oak preferred) in water for 30 minutes before using. Fill your smoker with the soaked chips and preheat to 225°F. You'll know it's ready when you see clean, blue smoke (not thick white steam). Place the pork backbone fat-side up on the smoker grate—this allows the rendered fat to baste the meat as it cooks.
Add a water pan to the smoker to maintain moisture levels. The goal is to cook the pork slowly and evenly. Here's the thing—resist the urge to open the smoker during the first 4 hours. Every time you peek, you lose heat and extend cook time. Trust the process and let that smoke work its magic.
🍳 Step 3: Smoke Until Probe-Tender
Smoke the pork backbone for 6-8 hours until the internal temperature reaches 165°F at the thickest part. This is where the magic happens—the collagen breaks down, transforming tough connective tissue into silky tenderness. You'll notice the meat hitting "the stall" around 160°F—this is normal and expected.
When the internal temperature hits 165°F, wrap the pork tightly in butcher paper (not aluminum foil—it traps too much steam). Return it to the smoker and continue cooking until the internal temperature reaches 200°F and a probe slides in like butter. This usually takes another 2-3 hours. The paper wrap helps maintain that beautiful bark while pushing the meat through the stall.
🥘 Step 4: Prepare the Glaze and Finish Cooking
While the pork finishes cooking, make the glaze by combining the 0.25 cup apple cider vinegar, 0.25 cup yellow mustard, 0.25 cup honey, and 0.5 cup beef broth in a saucepan. Bring to a simmer over medium heat and cook for 5-7 minutes until slightly thickened. This glaze adds tangy sweetness that cuts through the richness of the pork.
Once the pork reaches 200°F, remove it from the smoker and brush generously with the glaze mixture. Return it to the smoker (now set to 250°F) for 15-20 minutes to caramelize the glaze and create that glossy finish. The pork is done when the glaze is sticky and the meat is fork-tender.
⏰ Step 5: Rest and Serve with Confidence
Transfer the pork to a cutting board and let it rest for 15-20 minutes before slicing. This resting period allows the juices to redistribute throughout the meat, ensuring every bite is moist and flavorful. The bark should be deep mahogany with visible char in spots, while the meat should pull apart effortlessly with just a fork.
Slice the pork against the grain into ½-inch thick pieces and arrange on a serving platter. Drizzle any remaining glaze over the top and serve with extra glaze on the side. Each bite should deliver perfect harmony of smoky, sweet, and tangy flavors with that irresistible contrast of crispy bark and tender meat. This is what makes pork backbone worth the effort!
Pro Tips For Making Bbq Pork Backbone
- SEAR THE BONE FIRST: Start with a screaming-hot pan—no oil needed. The pork backbone’s natural fats will render and create a crust that locks in flavor. I used to skip this, and the meat always tasted duller afterward.
- CHOP ONIONS SMALL: Dice those yellow onions into ¼-inch pieces, not chunks. They’ll caramelize faster and blend into the sauce instead of sitting as identifiable bits. Sounds tedious, but it’s the thing that matters most for texture.
- DON’T RUSH THE SMOKED PAPRIKA: Sprinkle it in after the onions soften, not at the start. Bloom it with a splash of water or broth for 30 seconds—this deepens its smoky punch. I learned this the hard way when my first batch tasted flat.
- REST UNDER FOIL: Once the backbone hits 145°F, tent it with foil for 10 minutes. This keeps it juicy while you finish the sauce, and the residual heat carries through. Skipping this step means dry, sad meat.
Pro cooking tips for this recipe
Smoke Temperature Secrets
Your smoker's temperature is the foundation of success—225°F is non-negotiable for that perfect balance of tenderness and bark. I use a ThermoWorks Smoke thermometer because it's accurate to within ±2°F. Place it in the smoker, not the cooking chamber, to get true air temperature. If your smoker runs hot, add ice to your water pan or use soaked wood chips to stabilize temperatures. Remember, every 5°F above 225°F can dry out your pork, while 5°F below extends cook time unnecessarily. 🌡️
Bark Development Tricks
For that coveted crispy bark, start with a hot grill or smoker at 400°F for 10-15 minutes on each side before dropping to 225°F. This sears the rub and kickstarts the Maillard reaction. I like to use butcher paper (not foil) during the final hour to maintain bark while pushing the meat to 200°F. Pro tip: Spritz the pork with apple cider vinegar every hour after the first 4 hours—this keeps the surface moist enough for bark development without steaming the meat.
Wood Chip Wisdom
Hickory gives bold smoke flavor, while oak provides a milder, more balanced profile. I prefer a 50/50 mix of both for pork backbone. Soak your chips for 30 minutes before use to prevent flare-ups and ensure steady smoke production. For extra depth, add ½ cup pecan wood chips during the final 30 minutes of cooking—they add a subtle sweetness that complements the glaze. Never use pine or cedar—their strong flavors can overpower the pork.
Glaze Timing Matters
Apply the glaze only when the pork reaches 200°F—earlier and it'll burn, later and it won't caramelize properly. I like to make the glaze with honey and apple cider vinegar because the acid helps cut through the fat while the honey adds just enough sweetness. Brush it on generously and return the pork to the smoker at 250°F for 15-20 minutes. The glaze should be sticky but not runny—this means it's caramelized just right. 🍯
Resting Like a Pro
Never skip the 15-20 minute rest—this is where the magic happens. The juices redistribute during this time, ensuring every bite is moist. I wrap the pork in a clean kitchen towel and place it in a 200°F oven while resting to maintain internal temperature. Slice against the grain into ½-inch pieces—this gives you that perfect texture contrast between crispy bark and tender meat. The first time I skipped resting, I ended up with dry slices that didn't live up to the effort. Trust me, it's worth the wait!
Equipment Upgrades
If you're serious about pork backbone, invest in a digital meat thermometer with multiple probes—it's a game-changer for monitoring both air and meat temperatures simultaneously. A cast iron skillet comes in handy for searing the pork before smoking, and butcher paper (not foil) is essential for maintaining bark during the wrap phase. For beginners, a Traeger pellet grill simplifies temperature control, but a dedicated smoker gives you more flexibility. I've cooked backbone on everything from a Weber Smokey Mountain to a simple backyard grill—it's all about technique, not equipment. 🔥
Nutrition facts
Frequently asked questions
Can I substitute pork backbone with ribs or spareribs?
You can use pork ribs, but the technique differs slightly. For pork spareribs, cook them uncovered at 225°F for 4-5 hours until tender, then wrap in butcher paper for 1 more hour to develop bark. The backbone's unique shape and fat cap create a richer crust, but ribs still deliver amazing results with this method.
How do I know when the pork backbone is fully cooked?
Use a meat thermometer to check the internal temperature at the thickest part. It should reach 200-203°F—this ensures the collagen has fully broken down. The meat should pull apart easily with a fork, and the bark should be deep mahogany with visible char. Never rely on time alone!
What's the best way to reheat leftover pork backbone?
Wrap slices tightly in foil and reheat in a 275°F oven for 15-20 minutes. For extra crispiness, broil for 2-3 minutes at the end. Avoid microwaving—it turns the bark soggy. Leftovers keep well for 3-4 days in the fridge or 3 months frozen.
Can I make this on a grill instead of a smoker?
Use a two-zone fire method: place the pork on the cooler side (225°F) and move it to the hotter side (350°F) for bark development. Spritz with apple cider vinegar every hour to maintain moisture. Grilling works best with indirect heat—keep the lid closed as much as possible.
Why did my bark turn out too thin or not crispy?
Most likely, your smoker was too cool (below 225°F) or you didn't sear it first. For better bark: 1) Start with a 400°F sear for 10-15 minutes, 2) maintain 225°F consistently, 3) use butcher paper (not foil) during the final hour. The fat cap should render beautifully for that crispy texture!