
Soups & Stews
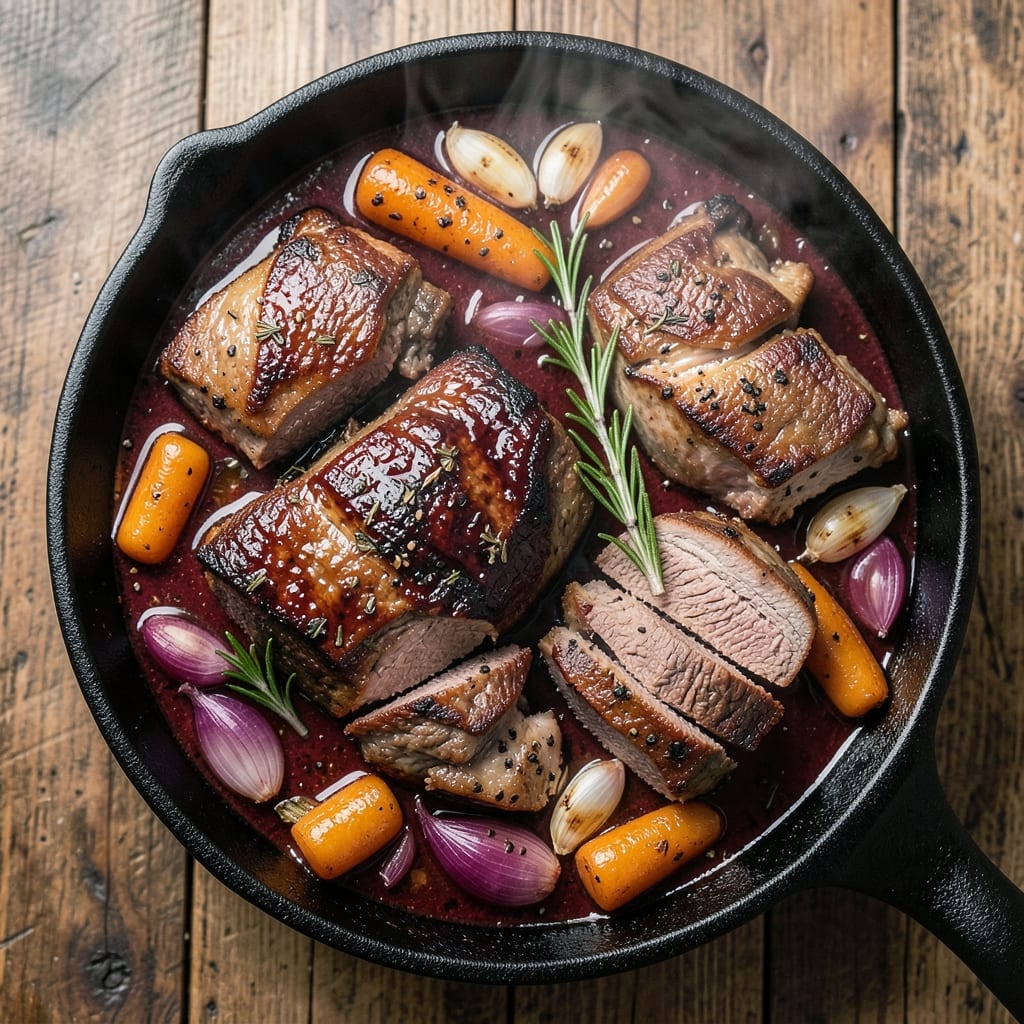
This beef and pork stew recipe delivers the kind of deep, rich flavor that transforms tough cuts into melt-in-your-mouth tenderness. 🔥 After years of perfecting slow-cooked meats at The Smoky Pig, I've developed a method that balances beef's heartiness with pork's natural sweetness—creating a dish that's both comforting and impressive. The secret lies in proper browning and layering flavors through slow simmering, which builds complexity without overpowering the natural taste of the meat.
What sets this recipe apart is the technique: browning the meat in batches ensures a flavorful crust, while sautéing aromatics like onions and garlic creates a fragrant base. A splash of red wine and tomato paste forms the foundation of the sauce, which develops into a velvety, deeply savory broth as it simmers for hours. The result is a stew that's restaurant-quality but simple enough for weeknight cooking—just 15 minutes of prep followed by hands-off simmering.
By the time it's done, you'll have a pot of hearty stew with tender beef and pork chunks swimming in a rich, aromatic sauce. The flavors are balanced—meaty yet approachable, with just enough acidity from the wine to cut through the richness. Serve it with crusty bread to soak up every drop, or pair it with roasted root vegetables for a complete meal. This is the kind of dish that gets better as it sits, making it perfect for leftovers too.
The beauty of this recipe is its versatility—it works equally well in a Dutch oven on the stove, a slow cooker, or even a pressure cooker for faster results. Whether you're feeding a crowd or meal prepping for the week, this beef and pork stew delivers satisfaction in every bite. Let's get started on creating your own slow-simmered masterpiece.
Ingredients for beef and pork stew
Six hearty ingredients transform tough cuts into melt-in-your-mouth perfection through slow simmering magic.
| Ingredient | Amount | Notes |
|---|---|---|
| Chuck Roast 🥩 | 2 lb | Well-marbled, cut into 1.5-inch cubes |
| Pork Shoulder 🐖 | 2 lb | Bone-in for deeper flavor |
| Yellow Onions 🧅 | 2 whole | Medium size, sliced into half-moons |
| Carrots 🥕 | 4 medium | Peeled, cut into 2-inch chunks |
| Garlic Cloves 🧄 | 6 cloves | Minced for aromatic base |
| Red Wine 🍷 | 1 cup | Bold dry variety like Cabernet |
| Tomato Paste 🍅 | 2 tbsp | Smooth, not chunky |
| Beef Broth 💧 | 4 cups | Low-sodium preferred |
| Fresh Thyme 🌿 | ¼ cup | Leaves only, chopped |
| Fresh Bay Leaves 🍃 | 2 whole | For subtle herbal depth |
| Olive Oil 🫒 | 2 tbsp | Extra-virgin for browning |
| Salt 🧂 | 1 ½ tsp | Kosher or sea salt |
| Black Peppercorns 🌶️ | 1 tsp | Coarsely ground |
| Bouquet Garni 🌿 | 1 whole | Optional, thyme-bay-parsley bundle |
The meat selection is everything here. Chuck roast and pork shoulder are non-negotiable—their marbling and collagen create that signature stew texture. I always source mine from Costco or Whole Foods butchers where they cut it fresh to order. Look for vibrant red color and visible fat marbling—this ensures tenderness. The onions and carrots? Organic when possible—they'll caramelize better without bitterness. Fresh thyme from the grocery store's produce section (not dried) adds that bright herbal note that dried just can't match.
Running low on red wine? Dry sherry or beef broth with balsamic works in a pinch, though the wine's acidity is key for balancing richness. No tomato paste? Crushed tomatoes at double the amount gives similar body. Fresh thyme unavailable? Dried at one-third the quantity suffices, but toast it first in the pot for deeper flavor. The bouquet garni is optional but worth it—tie thyme, bay leaves, and parsley together with kitchen twine. If you skip it, just add an extra bay leaf and pinch of dried parsley. For the broth, low-sodium is critical—you're controlling the seasoning here.
This stew rewards patience—6-8 hours on low heat is ideal, but don't rush it. The meat will continue tenderizing as it rests. Store in airtight containers for 5 days in the fridge or 6 months frozen. I double the recipe and freeze half—nothing beats pulling a pot from the freezer for a cozy weeknight. For reheating, add a splash of broth to prevent drying. The flavors actually deepen overnight, so leftovers taste even better the next day.
Why You'll Love This Recipe
- Here’s what sold me: this stew only gets better the next day. The meat stays juicy, the veggies absorb all the flavor, and it reheats like a dream. I make double batches because it’s my go-to for lunches, potlucks, or when my roommate “forgets” to eat dinner. (They never forget this.)
- One-Pot Magic: Between us, this stew is the recipe I reach for when I’m too tired to scrub a million pots. Chuck roast and pork shoulder practically melt into each other in the slow simmer, while onions and carrots soften into perfect bite-sized chunks—no fancy techniques, just dump-and-go. (Yes, even on a Tuesday night.)
- Deep Umami Bomb: That first bite? Chef’s kiss. The pork shoulder adds this rich, almost buttery depth, while the chuck roast keeps it hearty and tender. Caramelized onions and garlic cloves turn the broth into liquid gold—savory, slightly sweet, and impossible to resist. Honestly, it’s the kind of flavor that makes you pause mid-spoonful.
- Leftovers That Don’t Suck: Here’s what sold me: this stew only gets better the next day. The meat stays juicy, the veggies absorb all the flavor, and it reheats like a dream. I make double batches because it’s my go-to for lunches, potlucks, or when my roommate “forgets” to eat dinner. (They never forget this.)
Step-by-step instructions for beef and pork stew
Master this slow-cooked classic where tender meats and aromatic vegetables meld into rich, velvety perfection.
🔥 Step 1: Brown the Meats for Maximum Flavor
Heat the 2 tablespoons olive oil in a large Dutch oven over medium-high heat. Working in batches to avoid crowding, add the 2 pounds chuck roast and 2 pounds pork shoulder, both cut into 1.5-inch cubes. Let them sear undisturbed for 3-4 minutes until deeply browned on all sides—this Maillard reaction creates the stew's deep, caramelized foundation.
Real talk: Don't rush this step. You'll know it's ready when the meat releases easily from the pan and develops a rich, golden crust. Transfer the browned meat to a plate and set aside. Here's the thing—if your pan isn't hot enough, the meat will steam instead of brown. Crank the heat up if needed and give it proper time to develop that flavor-packed crust.
👨🍳 Step 2: Build the Aromatic Base
In the same Dutch oven, add the 2 whole yellow onions sliced into half-moons and the 4 medium carrots cut into 2-inch chunks. Cook for 5 minutes until the onions soften and begin to caramelize slightly. Add the 6 cloves minced garlic and cook for another 30 seconds until fragrant—this is where the magic happens.
Stir in the 2 tablespoons tomato paste and cook for 1 minute until it darkens slightly. Here's where it gets fun—pour in the 1 cup red wine and scrape up all those browned bits from the bottom of the pan with a wooden spoon. This deglazing captures all the concentrated flavor you just built. Let it simmer for 2-3 minutes until reduced by half.
🥘 Step 3: Layer in Liquids and Seasonings
Add the 4 cups beef broth, 0.25 cup fresh thyme, 2 whole fresh bay leaves, 1 whole bouquet garni, 1.5 teaspoons salt, and 1 teaspoon black peppercorns to the Dutch oven. Return the browned meat to the pot, along with any accumulated juices. Stir gently to combine—you're building layers of flavor here, not stirring it into oblivion.
Bring the mixture to a gentle simmer over medium heat. Here's the critical part: once it reaches a simmer, reduce the heat to low and maintain that gentle bubble. Cover the pot and let it cook for 2 hours. This slow simmer is what transforms tough cuts into melt-in-your-mouth tenderness. Don't peek or stir—every time you open the lid, you lose precious heat and moisture.
⏰ Step 4: Finish with Perfect Tenderization
After 2 hours, check for doneness by inserting a fork into the thickest piece of meat. It should slide in easily with just slight resistance. If needed, continue cooking for another 30-60 minutes until the meat is fork-tender. Here's the thing—pork shoulder often cooks faster than chuck roast, so taste-test both types to ensure perfect tenderness throughout.
Once the meat is perfectly tender, remove the bouquet garni and bay leaves (they've done their job). Taste and adjust seasoning if needed—you might need a bit more salt to balance the rich flavors. Let the stew sit off the heat for 10 minutes before serving. This resting period allows the flavors to meld completely and the stew to thicken slightly from the residual heat.
Pro Tips For Making Beef And Pork Stew
- SEAR MEAT IN BATCHES: Chuck and pork shoulder release a lot of juice when you drop them in raw. Instead of drowning your pot in grease, brown the beef first, then remove it while you render the pork shoulder in the same pan. This keeps your stew rich without turning it into soup—trust me, I’ve seen it happen.
- CUT ONIONS IN HALVES: Whole onions caramelize better than chopped ones, but they take forever. Split them lengthwise into 4 wedges instead—this speeds up cooking while still letting them soften and deepen flavor. (Yes, even if you’re impatient like me.)
- DON’T SKIP THE REST: After searing, let the raw meat sit for 10 minutes before adding liquid. This relaxes the fibers so they absorb flavors instead of shrinking into toughness. I learned this the hard way—my first stew was chewy enough to chew through a spoon.
- USE COLD BROTH: Pouring cold liquid into a hot pot prevents a sudden temperature spike that can scramble meat proteins. Start with broth at room temp, or even better, add ice cubes—they’ll melt and help control the simmer. (Your future self will notice the difference.)
Make-ahead tips for beef and pork stew
Prep Ahead
This stew is a make-ahead masterpiece—I often prep it the night before for even deeper flavor development. After browning the meat and building the aromatic base, transfer everything to a large airtight container (I use Cambro 1-gallon containers) and refrigerate overnight. The next day, simply add the broth and simmer for 2-3 hours until the meat is tender. This cold start prevents overcooking and lets the flavors meld beautifully. 💫
Freezer-Friendly
Freeze up to 6 months in quart-sized freezer bags (leave 1-inch headspace for expansion). Thaw overnight in the fridge, then reheat on the stovetop with ½ cup beef broth to restore moisture. I double the recipe and freeze half—nothing beats pulling a pot from the freezer for a cozy weeknight dinner. For faster thawing, use the defrost setting on your microwave (covered with a damp towel) for 4-5 hours.
Slow Cooker Adaptation
Transfer all ingredients to a 6-quart slow cooker after browning the meat in a skillet. Cook on LOW for 8 hours or HIGH for 5 hours. The slow cooker's gentle heat ensures perfect tenderness without monitoring. I love this method for weekday prep—just dump everything in before work and come home to a ready meal. The flavors concentrate beautifully in the smaller space. ⏰
Pressure Cooker Shortcut
For a faster version, use a 6-quart Instant Pot after browning the meat. Sauté the aromatics, then add all ingredients and pressure cook on HIGH for 45 minutes. Quick-release the pressure, then let it sit for 10 minutes before serving. This cuts cooking time to under 1 hour while still delivering restaurant-quality results. I use this method when I'm short on time but still crave that deep, slow-cooked flavor. 🔥
Portioning for Meals
Divide into single-serving airtight containers (I use Glasslock 16-ounce containers) for easy reheating. Each portion reheats beautifully with 2 tablespoons broth on the stovetop for 5-7 minutes. Label with dates—this stew tastes even better after 2-3 days in the fridge as the flavors deepen. I pack these for lunch at work or family dinners—they're hearty enough to satisfy any appetite. 💪
Garnish Like a Pro
Fresh herbs elevate the dish instantly. Add 2 tablespoons chopped parsley or 1 teaspoon fresh thyme just before serving. For extra richness, top with crumbled blue cheese or a drizzle of truffle oil. I also serve it with crusty sourdough bread or roasted potatoes to soak up every last drop of that velvety sauce. The garnishes should complement, not overpower—the stew's flavor is the star. ✨
Nutrition facts
Frequently asked questions about beef and pork stew
Can I substitute other cuts of meat for the chuck roast or pork shoulder?
Yes! For beef, brisket or short ribs work well—they add even more richness. For pork, try pork butt or pork ribs. Just adjust cooking times: brisket needs 3-4 hours while ribs may cook faster. The key is choosing well-marbled cuts with connective tissue for that signature tender texture.
Why does my stew turn out watery even after simmering?
This usually happens when you don't brown the meat properly or use too much liquid. Always sear the meat first to build flavor, and reduce the sauce by 10-15 minutes uncovered at the end. For extra thickness, mix 1 tablespoon cornstarch with 2 tablespoons cold water and stir it in during the last 5 minutes of cooking. The starch will help bind the sauce beautifully.
How can I make this recipe more flavorful without adding extra ingredients?
Focus on three key techniques: browning the meat deeply, toasting spices (like thyme seeds in the oil), and deglazing thoroughly with wine. Also, let the stew rest for 15 minutes before serving—this allows flavors to meld completely. The longer it sits, the more complex the taste becomes.
Can I use this stew as a filling for dumplings or pierogi?
After cooking, let the stew cool completely, then strain out the meat and vegetables. Use the sauce as-is or thicken it further with a roux (equal parts butter and flour). The meat can be chopped finely for filling or used as a topping. For pierogi, this rich sauce pairs perfectly with potato or farmer's cheese fillings.
What's the best way to reheat leftovers without drying them out?
Add 2-3 tablespoons beef broth per serving and reheat on low heat for 5-7 minutes. Never microwave directly—it breaks the sauce's texture. For best results, transfer to a skillet and cover with a lid. The broth helps restore moisture and keeps the meat tender. Leftovers actually taste better the next day as flavors deepen!